So, what do you do on an unexpected October snow day? Make stock! It helps warm up the house by adding heat and moisture, not to mention a wonderful aroma, as it simmers all day. I have posted about "stocking up" before, but never went through the process.
Here is how it is done:


3) The skin should come off fairly easy by rubbing the foot with your fingers. Here are 2 different feet. The skinless after picture belonged to a broiler and the one with skin was a year old rooster. The young broilers don't have tough skin, so the skin on their feet comes off completely. The rooster (who by the way made tasty soup, but needed to be simmered on low heat for about 10 hours) we culled from our laying flock had tougher skin, so the outer layer came off along with the outer layer of the spur. This left an under layer of skin. You could remove the spur completely if bothers you by clipping it off.

Here is how it is done:
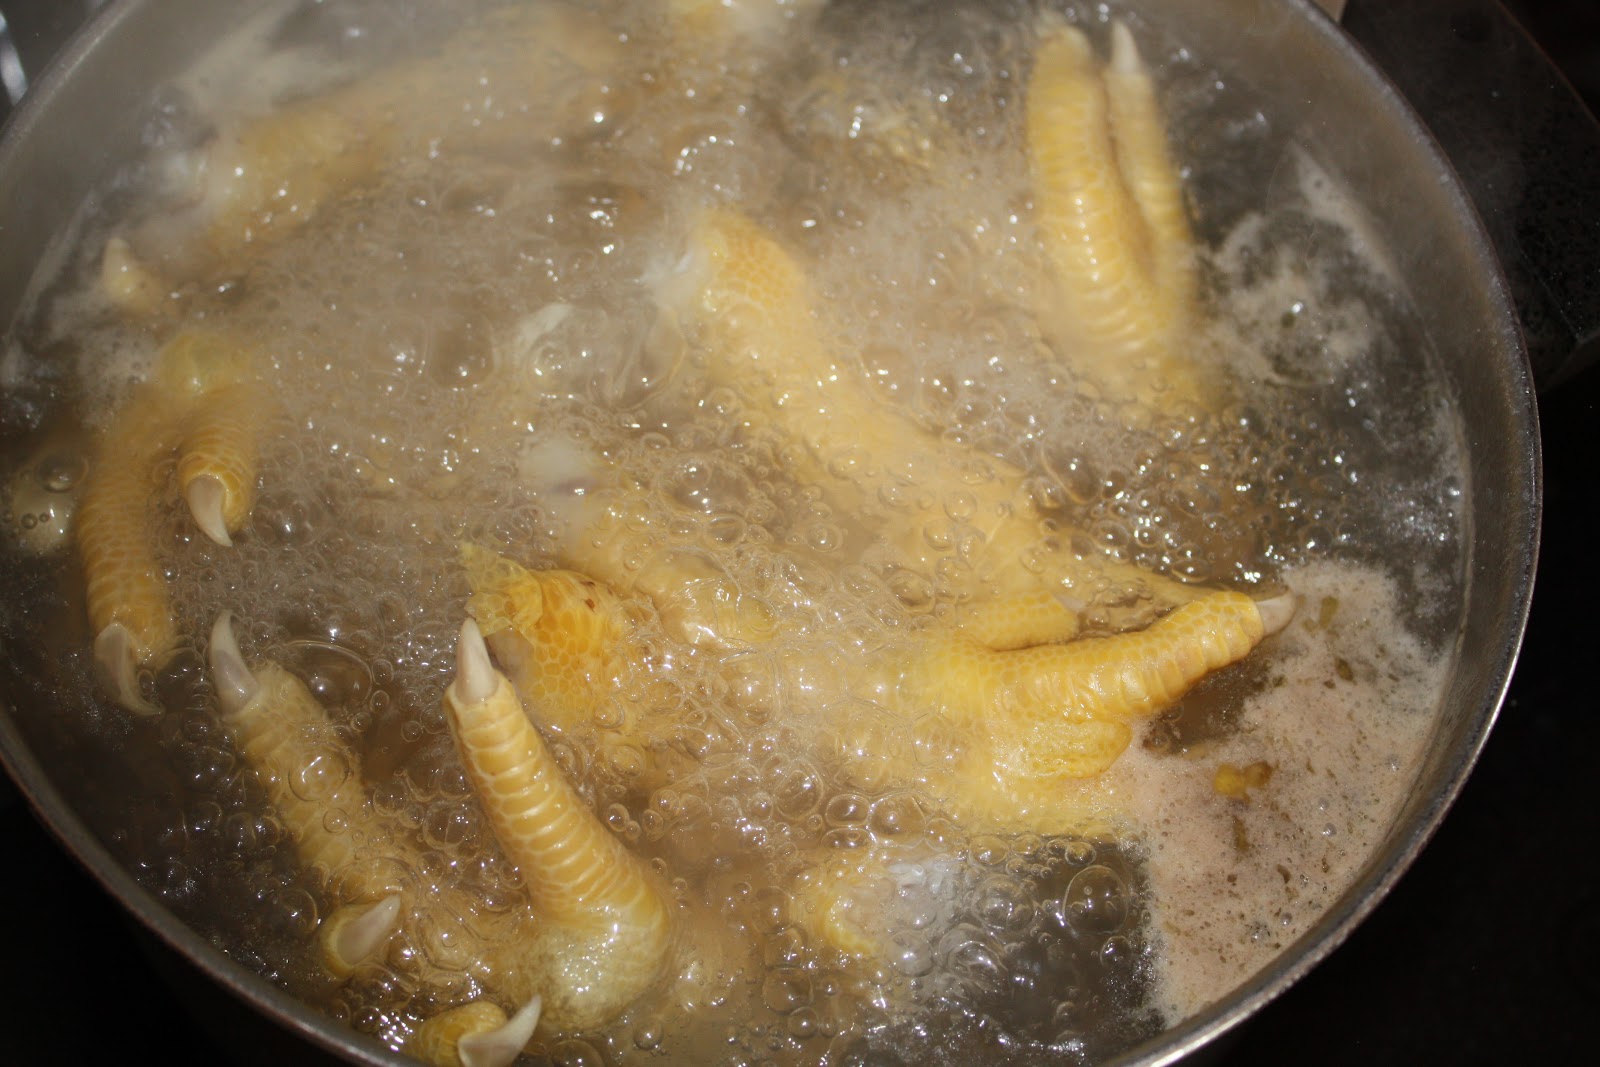
1) The feet were washed fairly well from tumbling in the feather plucker when the chickens were being processed. Give them a rinse as needed. Meanwhile, bring water to a boil in a stock pot.

2) Submerge feet in the water in small batches for a few minutes. This is to help loosen the skin. It is the same idea as removing the peel from tomatoes for processing.
 |
| Broiler- before |
 |
| Broiler- removing skin |
 |
| Broiler- after |
 |
| Rooster- after |
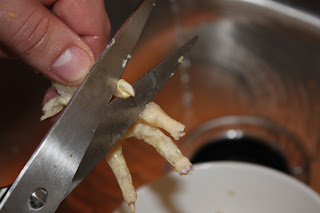
4) Using kitchen shears, clip off the nails. Do this by cutting the tip of each toe off.

5) Now the feet are ready to make stock. Put them in a clean pot large enough to hold them. I add celery (stalks and leaves), carrots, onions, garlic, and a bay leaf to every stock. Depending on what I have for herbs I may add a few sprigs of rosemary or thyme. Ground herbs should not be added at this time since they will float and you will skim them off during cooking. If you want to add them, wait until you have skimmed off any foam. I may add a small amount of sea salt, but not much. The salt will be added when I use the stock- just keep in mind, if the recipe calls for conventional, canned stock, you will probably want to add more salt than the recipe calls for since it is assuming some salt was already added from the canned stock. When using the stock, add the salt in small amounts and taste test.
Fill pot with enough water to cover the feet and vegetables.

6) Let the pot simmer- the longer the better! Avoid a mess by not boiling it, so keep the heat low. You should not have to stand over this pot all day! Just let it do its magic and check on it every once in a while. I have started making stock in the afternoon and left it on low to barely simmer over night. You may need to add water as it boils down and skim off foam which rises to the top. This particular stock simmered for about 14 hours.
7) When you feel it is done, remove from heat and let cool for a few minutes. Strain into a bowl. You may need to let the stock cool a bit more before putting into containers for storage. If you cool completely in the refrigerator, you will see a fabulous, "Jello"-like stock. This is due to the gelatin in the feet- gelatin is highly valued in quality stocks! I will also skim off the small amount of fat which floats to the top.
 |
| Straining the stock. |
 |
| Here is stock in a pint size, wide mouth canning jar- almost freezer ready. I just want to scrape off the thin layer of fat on the top with a spoon. Notice I left at least an inch of head space in the jar (for expansion)! |
 |
| This is stock I put into a Pyrex bowl and placed in the refrigerator. I was able to cut into it with a spoon! Don't worry, it will liquefy once heated into a very luxurious stock. |
Storage:
Some stock will stay in the refrigerator for use over the next few days. The rest will need to be frozen. I like to use pint sized, wide mouth canning jars. The ones I use (Ball brand) are freezer safe- check the manufacturer's recommendations if you're using another variety and make sure they are wide mouth (allows for expansion during freezing without putting pressure on the jar causing it to crack). These store nicely in the freezer door. I use sticky labels to date them and specify which kind of stock it is (turkey and chicken stock look exactly alike).
I also use Foodsaver bags (you have to make sure stock is completely cooled first). I pour stock into a measuring cup, write the necessary information on the bag with permanent marker, pour in the stock, push out as much air as possible, then manually seal (don't use the vacuum seal!). This allows me to lay the bags flat in the freezer- so they take up less space. You can also pour in the stock, place bag into the freezer (in upright position) and allow to freeze, then seal (using vacuum seal). The only problem is this makes bulky packages since it freezes in its upright shape and takes up too much room for my liking. Ziploc bags would probably also work in the same way- but make sure they are well sealed before laying flat!
No comments:
Post a Comment